
The first raised bed I ever built leaned about two inches to the left by the time I filled it with soil. I’d skipped the corner bracing because I figured four screws per corner was “enough.” It wasn’t.
I fixed it, learned my lesson and have built a lot more beds since then without a single lean.
This guide covers everything you need to actually build a raised garden bed that lasts, not just one that looks fine on day one. We’ll go through planning, choosing materials, the full build process, filling it with soil and what to do once it’s planted.
If you’re looking for hard surface installs like concrete or patio setups, that’s covered here too, along with a free downloadable plan you can use as a starting template.
One quick note on scope. This guide focuses on building and filling the bed itself. It doesn’t get into irrigation system setup or ongoing watering schedules in depth, our Garden Watering & Aftercare Guide covers that separately.
And if you’re still deciding between a raised bed and just planting in the ground, it’s worth a quick read of our raised bed vs. in-ground comparison first.
What is a raised garden bed? A raised garden bed is a framed, above-ground planting area filled with soil, usually built from wood, metal, or block, that sits higher than the surrounding ground. It gives you better drainage, easier access, and full control over your soil quality from the start.
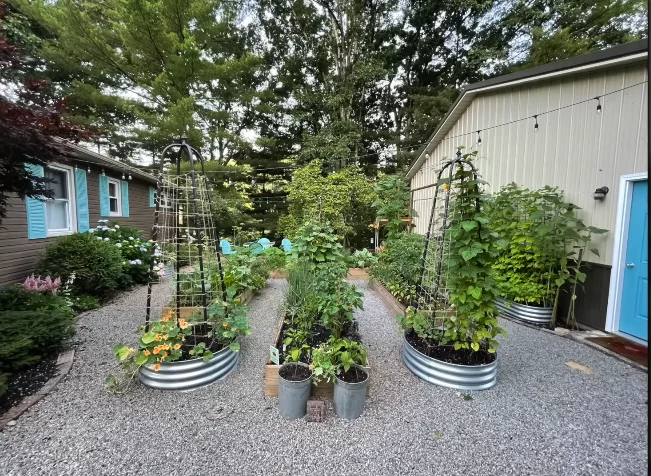
Quick Answer: Steps to Build a Raised Garden Bed
- Pick a sunny, level location
- Decide on your bed size, depth, and material
- Gather your tools and materials
- Cut your lumber to size
- Assemble and reinforce the frame
- Line the bottom and prep the site
- Fill the bed with a good soil mix
- Plant and space your crops
That’s the whole process. Now let’s actually walk through it.
Why Build a Raised Garden Bed
I’ll be honest, the first reason I built raised beds had nothing to do with plants. I have bad knees and bending all the way to the ground to weed was miserable. Raised beds fixed that overnight.
Beyond your back, raised beds drain better than most native soil, especially if you’re dealing with clay. You control exactly what soil goes in, which matters a lot if your yard’s dirt is rocky or poor.
The defined edges also keep foot traffic out, which means less soil compaction over time, and honestly, a raised bed just looks tidier than a patch of dug-up lawn.
Plan Your Raised Garden Bed
Choosing the Right Location
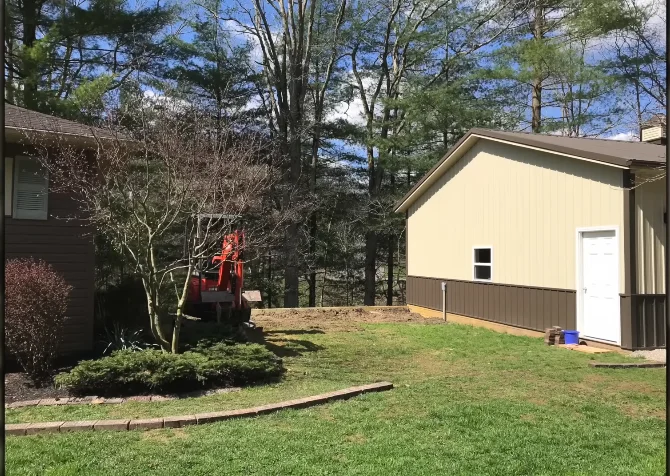
Most vegetables want 6 to 8 hours of direct sun a day. Walk your yard at different times before you commit to a spot, because a place that looks sunny at 9am can be shaded by a fence by 2pm.
Keep the bed away from large trees. Tree roots will absolutely find their way into a raised bed and steal water and nutrients from your plants. I made this mistake once with a bed too close to an old maple and I spent an entire season fighting roots that had crept in from underneath.
Pick a spot near your water source too. If watering your garden means dragging a hose across the entire yard every day, you’ll water less often than you should.
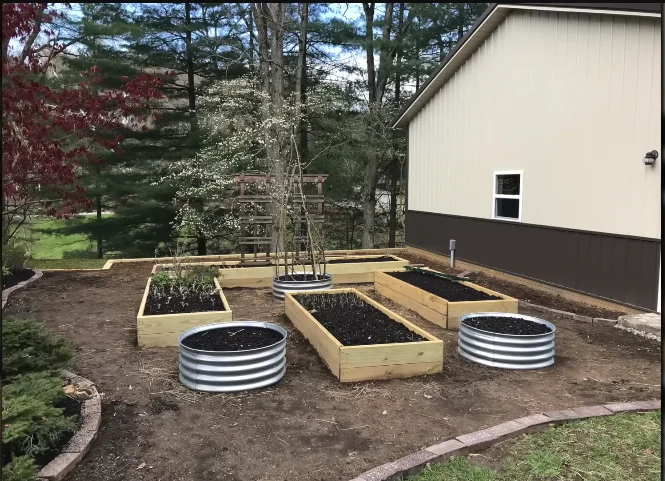
Bed Orientation and Sun Direction
Once you’ve picked your spot, think about which way the bed itself faces. Running the long side of your bed east to west generally lets more sunlight reach all your plants evenly throughout the day.
Since the sun’s path won’t be blocked by your own taller crops as much. It’s a small detail, but it genuinely affects how evenly things grow across the bed.
Deciding on Bed Size and Width
Here’s a rule that saves a lot of frustration: don’t build a bed wider than you can comfortably reach across from one side, or two sides if you can access both. Most people can reach about 2 feet in, so a 4 foot wide bed with access on both sides works well for almost everyone.
Length is more flexible. Standard lumber comes in 8, 10, and 12 foot lengths, so building to those dimensions (or half of them) wastes less wood. A 4×8 bed is a genuinely popular size for good reason, it’s roomy without needing extra center supports.
How Many Raised Beds Do You Need
This is one of those questions nobody asks until they’ve already built one bed and realized it’s not enough. As a rough guide, one 4×8 bed can support a small household’s fresh vegetable habit for the summer.
Think a handful of tomato plants, some herbs and a row or two of greens. If you’re hoping to actually grow a meaningful portion of your produce, plan for two or three beds, and honestly, most gardeners I know end up adding “just one more bed” within the first year anyway.
How Deep Should a Raised Garden Bed Be
Most vegetables do fine with 8 to 12 inches of soil depth. If you’re building directly over decent native soil, you can go a bit shallower since roots will keep growing down past the frame.
If you’re building on concrete or a hard surface, aim deeper, closer to 12 to 18 inches, since the roots have nowhere else to go.
Raised Bed Depth by Plant Type
Not every plant needs the same amount of room. Here’s a simple breakdown.
| Plant Type | Minimum Depth |
| Lettuce, herbs, spinach | 6 to 8 inches |
| Beans, peas, peppers | 8 to 10 inches |
| Tomatoes, cucumbers, squash | 12 inches |
| Carrots, potatoes, other root crops | 12 to 18 inches |
If you’re mostly growing shallow-rooted greens, you can save money by building a shorter bed. If root vegetables are on your list, don’t shortcut this one, they genuinely need the extra depth to grow straight and full-sized.
Building on Concrete, Patio, or Hard Surfaces
If your only sunny spot is a patio or driveway, you can absolutely still build a raised bed there. The key difference is you don’t want soil sitting directly on the hard surface with no drainage path.
Instead of a solid bottom, create a permeable bottom using hardware cloth or landscape fabric that lets water drain through while holding the soil in. Go deeper than you would on ground soil, since roots can’t extend past the frame.
Also keep in mind that water draining out the bottom can stain concrete or damage a wood deck, so plan for that runoff, maybe with a layer of gravel underneath or by positioning it where drainage won’t cause problems.
If a patio or driveway is genuinely your only option and a full raised bed still feels like a lot of build, containers are a completely valid alternative worth considering, our Container Gardening for Beginners guide walks through that path.
Choose Your Raised Bed Material
Comparison Table: Wood vs. Metal vs. Concrete Block vs. Stone
| Material | Cost | Lifespan | Ease of Building | Notes |
| Pine (untreated) | Low | 5 to 7 years | Easy | Budget-friendly, rots fastest |
| Cedar or redwood | Medium to high | 15 to 20+ years | Easy | Naturally rot-resistant |
| Metal (galvanized) | Medium | 15 to 20+ years | Easy, often kits | Heats up in full sun, good drainage |
| Concrete block | Low to medium | Decades | Moderate | Heavy, fast to assemble, retains heat |
| Stone | High | Decades | Difficult | Best for permanent installs |
Best Wood Types for Raised Beds
Cedar and redwood are the gold standard for wood beds. They’re naturally resistant to rot and insects, and they’ll last well over a decade without any special treatment. Pine is the budget option and there’s nothing wrong with it, just know you’re looking at maybe 5 to 7 years before it starts breaking down.
Whatever wood you choose, make sure it’s untreated. Pressure-treated lumber contains chemicals that can leach into your soil and end up in the food you’re growing. I know it’s tempting because treated wood is cheaper and lasts longer, but it’s not worth the risk in a food garden.
Wood Stain and Sealant Options
If you want to protect the outside of your wood without risking your soil, use a food-safe, outdoor exterior stain and sealer on the outer surface only, never the inside walls that touch soil. A semi-transparent stain lets the wood grain show through, which honestly looks nicer than a solid opaque finish in my opinion.
DIY vs. Pre-Made Raised Bed Kits
Building your own bed from raw lumber is cheaper and lets you customize the exact size you want. A pre-made kit, usually galvanized metal, costs more upfront but saves you the cutting and measuring, and most snap or bolt together in under an hour.
If you’re not confident with tools or just want to get planting faster, a kit is a completely reasonable choice. I’ve used both, and honestly, my metal kit beds have held up just as well as my wood ones with a fraction of the build time.
How Long Will Your Raised Bed Last
Realistically, expect pine to need replacing within 5 to 7 years, cedar or redwood to last 15 to 20 years, and metal or concrete to outlast almost everything else if maintained. None of this is exact, weather, moisture, and how much you baby the wood all play a role.
Gather Your Tools and Materials
Tools You’ll Need
- Tape measure
- Pencil
- Drill with pilot drill bit
- Saw, or have your lumber cut at the store
- Carpenter square
- Safety glasses
- Shovel and digging fork
- Wheelbarrow for moving soil
Materials Shopping List
For a standard 4×8 foot bed at about 12 inches deep, you’ll need roughly:
- Four 2×12 boards, cut to size (two at 8 feet, two at 4 feet)
- Four 4×4 posts, cut to about 12 inches, for corner supports
- Exterior wood screws, 3 inches
- Hardware cloth or landscape fabric for the bottom
- Staple gun and staples
Estimated Cost to Build a Raised Garden Bed
A pine 4×8 bed usually runs somewhere between 60 and 120 dollars in lumber alone, depending on your local prices. Cedar or redwood will roughly double that.
A comparable metal kit typically runs 100 to 250 dollars depending on brand and depth. None of these numbers include soil, which we’ll get to next, and soil is often the bigger expense of the whole project.
NOTE
Price may change time to time. so it is not fix.
These prices shift with lumber costs and your region, so treat them as a rough starting point rather than a quote. If you’re not in a rush, lumber prices and metal kits both tend to dip around late fall and early winter when garden demand drops off, worth keeping an eye out if your timeline is flexible.
How to Build a Raised Garden Bed Step by Step
Step 1: Cut Your Lumber to Size
Measure twice before you cut once, it’s a cliché for a reason. A circular saw handles straight cuts on boards like this just fine, and a miter saw makes quick work of the corner posts if you have one.
If you’re not comfortable cutting yourself, most hardware stores will cut your lumber to length for free or a small fee when you buy it there.
Step 2: Assemble the Frame
Lay your side boards flat and attach the corner posts first, using at least two screws per connection. Then attach the end boards to the same posts, forming a complete rectangle. Work on a flat surface like a driveway or patio if you can, it’s much easier than trying to square things up on uneven ground.
Step 3: Reinforce and Stabilize the Bed
This is the step I skipped on my very first bed, and it’s the one I’ll never skip again. Add a center support board across the middle of any side longer than about 6 feet. Wet soil is heavy, and it will slowly push your walls outward without something holding them in place.
If you’re reading this after the fact and your bed is already leaning, don’t panic, it’s fixable. Empty enough soil from that side to relieve the pressure, screw a center support board across the bowing wall from the outside, then refill. It takes an afternoon and it’s exactly the fix I used on mine.
Step 4: Line the Bottom
Staple hardware cloth or landscape fabric across the bottom edges before you move the bed into place, this is often just called a raised bed liner. It helps with drainage and keeps burrowing pests from tunneling up from underneath.
Step 5: Gopher and Pest Proofing
A quick warning here, chicken wire will not stop gophers. The holes are simply too big. If gophers are a known problem in your area, use hardware cloth instead, it’s a tighter metal mesh that they genuinely can’t chew through. I learned this the annoying way after losing half a bed of carrots to a very persistent gopher.
Step 6: Position the Bed and Prepare the Site
Move your frame to its final spot. Clear away grass or weeds underneath, you don’t need to dig it all out, laying cardboard or several layers of newspaper down first will smother it naturally as the bed settles in. Level the frame as best you can before filling it.
Fill Your Raised Garden Bed with Soil
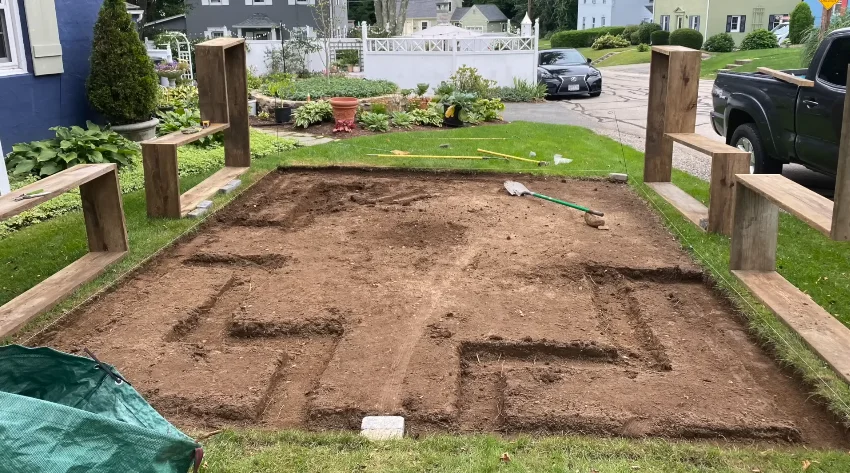
Soil Mix Options
You’ve really got two solid paths here. The first is a mix of about half native soil and half compost, which works well if your existing dirt isn’t terrible and you just want to boost it.
The second is a full potting-style mix, often called Mel’s Mix in square-foot gardening circles, made from roughly equal parts compost, vermiculite and peat moss or coconut coir. It costs more but takes the guesswork out entirely.
If you’re buying in bulk, ask your supplier for topsoil blended for raised beds specifically, plain topsoil alone tends to compact too hard over time without compost mixed in.
Many local cooperative extension offices also publish soil mix recommendations suited to your specific region, worth a quick search if you want guidance tailored to your climate.
How Much Soil Do You Need
For a 4×8 bed filled to 12 inches deep, you’re looking at about 32 cubic feet of soil, which is roughly 10 to 12 standard wheelbarrow loads, or you can order it in bulk from a landscape supplier and have it delivered.
Plant and Space Your Raised Bed
For a deeper dive into this spacing method beyond raised beds specifically, see our Square Foot Gardening Explained guide.
Using the Square-Foot Method for Spacing
One of the easiest ways to plan what goes where is to mentally divide your bed into 1 foot by 1 foot squares. Then use the spacing guidance on your seed packet, usually listed as “thin to X inches,” to figure out how many plants fit per square.
Carrots thinned to 3 inches apart means about 16 per square. Bush beans at 4 inches means about 9 per square. Lettuce at 6 inches gets you 4 per square. Larger plants like broccoli or tomatoes often only fit one per square, sometimes one per several squares.
Companion Planting Basics
Some plants genuinely do better next to each other. Basil planted near tomatoes is a classic pairing that can help deter certain pests. Beans, being legumes, add nitrogen back into the soil, which benefits heavy feeders like squash planted nearby the following season.
You don’t need to master this before your first planting, but it’s worth keeping in mind as you decide what goes in which square.
Crop Rotation for Raised Beds
If you’re planning more than one bed, rotate what you grow in each one year to year rather than planting the same family in the same spot every season.
Tomatoes, peppers, and potatoes are all in the nightshade family and are especially prone to soil-borne issues if grown in the same bed repeatedly. A simple three or four bed rotation, moving each plant family to the next bed each year, keeps soil healthier with very little extra effort.
Raised Beds for Flowers vs. Vegetables
Everything in this guide works just as well for a raised flower bed as it does for vegetables, the building process really doesn’t change. The main difference is depth.
Most annual flowers and perennials do fine in the 6 to 10 inch range, so you can often build a shallower, less lumber-heavy bed if flowers are the plan.
Just skip the deep root-vegetable depth guidance above and build to whatever suits your particular flowers, most nursery tags will tell you their root depth needs.
After You Build: Watering and Maintenance
Raised beds dry out faster than in-ground gardens, since they drain so well and get more air exposure around the sides. Expect to water more often, especially in the first few weeks after filling and planting. Check the soil a couple inches down with your finger, if it’s dry there, it’s time to water.
A layer of mulch on top helps slow that moisture loss down quite a bit, and it’s worth adding once your plants are a few weeks in. For a full watering schedule and ongoing routine, our Garden Watering & Aftercare Guide covers this in more depth.
Common Raised Garden Bed Mistakes
- Skipping the center support brace. This is probably the most common mistake. Without a center brace, the long sides of an 8-foot bed can bow outward as the soil settles.
- Using treated lumber. It may save money upfront, but it’s generally not the best choice for a vegetable garden. Use naturally rot-resistant wood like cedar or redwood if your budget allows.
- Building the bed too wide. If you can’t comfortably reach the center from either side, routine tasks like planting, weeding, and harvesting become much harder.
- Ignoring drainage on hard surfaces. Placing a raised bed on concrete or another hard surface without considering drainage can lead to standing water, poor root health, and potential damage to the surface underneath.
- Forgetting about future maintenance. Leave enough space around the bed so you can easily walk, push a wheelbarrow, and work without stepping into the growing area.
These are just the mistakes specific to building. For a broader list once you’re planted and growing, our Common Beginner Gardening Mistakes guide rounds out the rest.
Frequently Asked Questions
How deep should a raised garden bed be?
Most vegetables do well with 8 to 12 inches of soil depth. Root vegetables like carrots and potatoes need closer to 12 to 18 inches.
What wood is safe to use for raised garden beds?
Untreated cedar, redwood, or pine are all safe choices. Avoid pressure-treated wood, since the chemicals used to treat it can leach into your soil.
How much soil do I need for a raised bed?
A standard 4×8 bed at 12 inches deep needs about 32 cubic feet of soil, roughly 10 to 12 wheelbarrow loads.
Can you build a raised garden bed on concrete?
Yes. Use a permeable bottom like hardware cloth instead of a solid base, build a bit deeper than usual, and plan for drainage runoff so it doesn’t damage the surface underneath.
Do you need to line the bottom of a raised garden bed?
It’s a good idea. A hardware cloth or landscape fabric liner helps with drainage and keeps burrowing pests from getting in from below.
How much does it cost to build a raised garden bed?
A pine 4×8 bed typically costs 60 to 120 dollars in lumber. Cedar or redwood roughly doubles that, and a metal kit usually runs 100 to 250 dollars.
Do I need to remove the grass underneath first?
Not entirely. Laying cardboard or several layers of newspaper over the grass before filling the bed will smother it naturally without you having to dig it all out.
Can I use old pallets or reclaimed wood?
Sometimes, but be careful. Pallets are often treated with chemicals for shipping, so check for markings before using them anywhere near food crops. Reclaimed wood from a known, untreated source is usually fine.
What to Do Next
Once your bed is built and filled, the next steps are choosing what to grow and getting your soil dialed in for those specific plants. Our guides on soil preparation and choosing beginner-friendly vegetables pick up right where this one leaves off.
References:
University of California Agriculture & Natural Resources (UC ANR) – Benefits of Raised Bed Gardening
https://ucanr.edu/blog/napa-master-gardener-column/article/benefits-raised-beds
Texas A&M AgriLife Extension – Raised Bed Gardening
https://agrilifeextension.tamu.edu/asset-external/building-a-raised-bed-garden/