
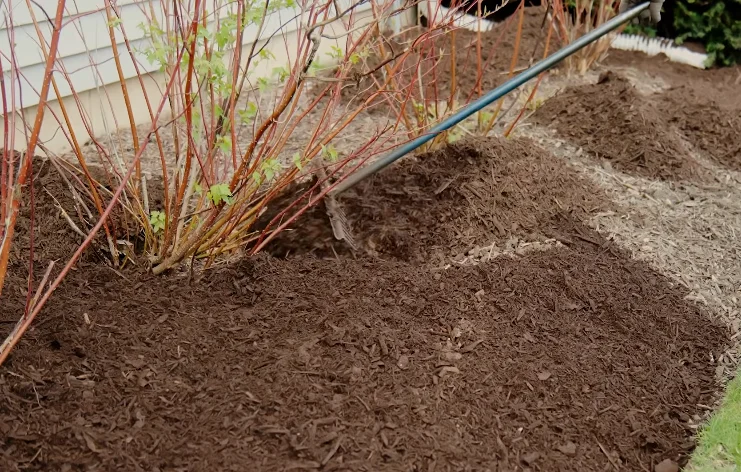
Weeds don’t need an invitation. Leave a patch of bare soil in your garden for even a week, and something green will find it. The good news is that you don’t need to spend every weekend on your knees fighting them. Once you understand why weeds show up in the first place and how mulch actually works against them, the whole job gets a lot easier.
With that in mind, this guide walks you through both halves of the job. That means pulling the weeds you already have, and using mulch to keep new ones from showing up, so you’re not stitching two different articles together in your head.
Table of Contents
Why Weeds Take Over (and Why Mulch Alone Isn’t Magic)
Before you touch a shovel, it helps to know what you’re actually up against. Weeds aren’t malicious. They’re just fast, opportunistic plants doing exactly what evolution built them to do. They grab any open, sunny patch of dirt before something else does.
How Weed Seeds Actually Germinate
Most weed seeds need two things to sprout, light and disturbed soil. That’s one reason why the worst weed outbreaks usually follow tilling, digging, or any time you’ve turned the dirt over. You’ve woken up seeds that were sitting there, dormant, waiting for their chance.
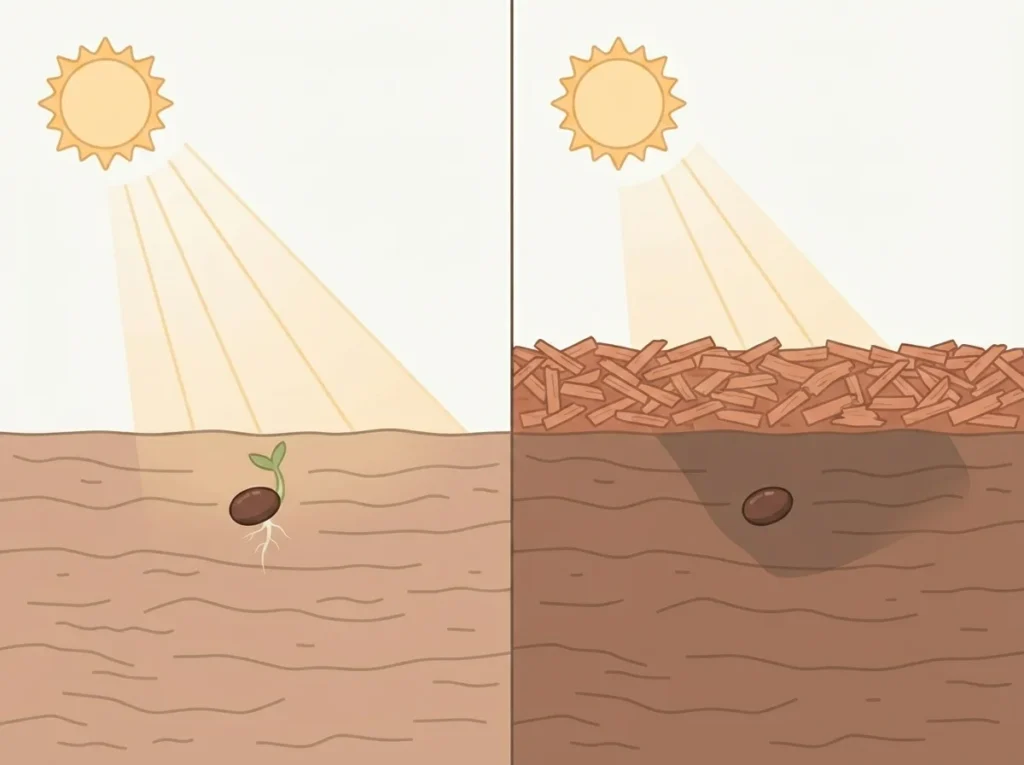
That brings us to why mulch works as well as it does. A layer of mulch blocks that light. No light, no germination signal, no weed.
Gardening pro Kelly Funk put it simply when I read her take on it.
She explains that
“Mulch blocks sunlight, which is needed for seeds to germinate”
In other words, once you understand that one mechanism, a lot of your mulching decisions start making more sense.
Does Mulch Prevent Weeds Permanently?
Here’s the honest answer. No. Mulch dramatically cuts down weed growth, but it doesn’t seal your garden in a bubble. Seeds still blow in on the wind, birds still drop them, and mulch itself breaks down over time and stops blocking light as effectively.
Think of mulch less like a wall and more like a really good speed bump. It slows weeds down enormously, and some studies point to mulch stopping the majority of weed seeds from germinating when it’s applied correctly. Even so, it doesn’t stop every single one, forever, with zero effort from you.
I mention this up front because it saves people a lot of frustration. If you mulch once and expect a weed-free garden for the rest of the season, you’re setting yourself up to feel like it “didn’t work.” Truth is, it worked. It just needs a little upkeep, the same way anything else in a garden does.
Bottom line. Mulch is your best low-effort weed tool, not a permanent fix. Pair it with the weeding basics below, and you'll spend a fraction of the time you would otherwise.
Weeding the Right Way, First
Before we look at mulch types and depth charts, there’s a step that has to come first. Mulch works best on a bed that’s already weed-free. Mulching over existing weeds just gives them something cozy to grow through, so it’s worth doing this step properly before you spread a single scoop of mulch.
Hand-Pulling vs. Hoeing
For young, shallow-rooted weeds, a hoe does the job fast. You’re basically scraping them off at the soil line before they get established. For weeds with a taproot, or ones that have already gotten some size on them, hand-pulling works better instead, since you actually remove the root rather than just cutting the top off.
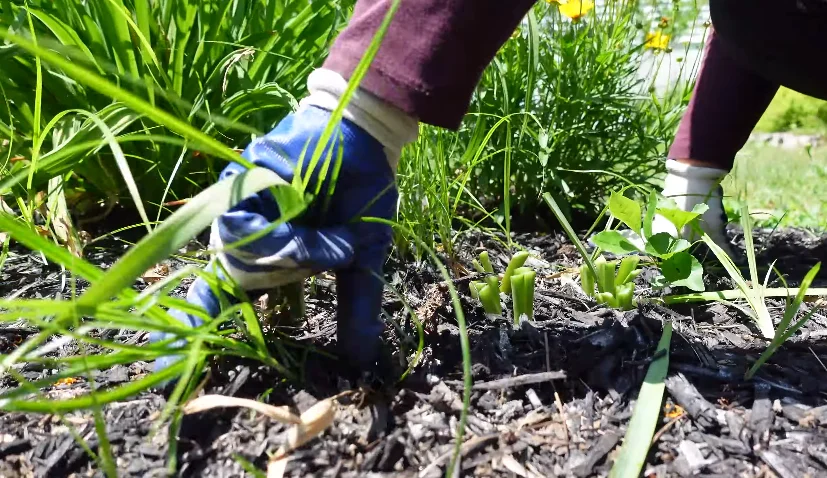
Timing matters more than people expect. Pull after rain or after you’ve watered, when the soil has some give to it. Grip the weed low, near the base, and pull steadily rather than yanking. In dry, compacted soil, roots snap off, and as a result the weed just grows back from what’s left underground.
Why Removing Weeds Before Mulching Matters
If you skip this step and mulch straight over an established weed patch, you’re not smothering anything. Established weeds usually have enough stored energy in their roots to push right through a few inches of mulch. So you end up doing the same job twice. Now you’re also digging weeds out from under a layer of mulch.
Common Beginner Mistakes
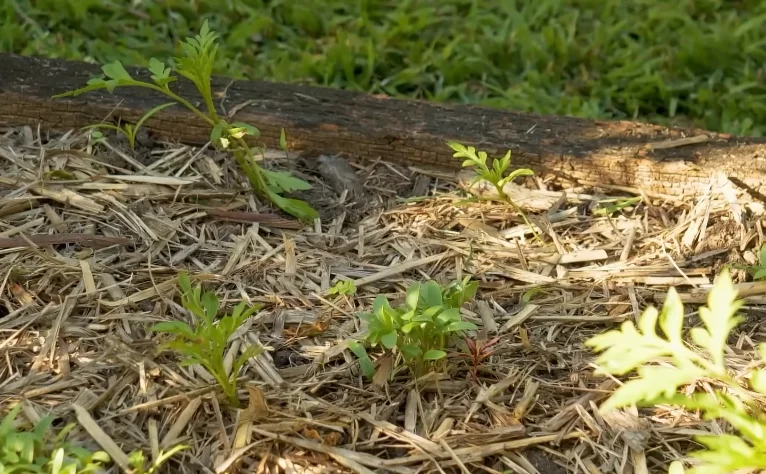
I made this exact mistake myself in my first season. I mulched a bed that still had a decent crop of chickweed hiding under the leaves of my vegetables, figured the mulch would handle it. It didn’t. A few weeks later, I was pulling weeds out from between wood chips, which is messier and slower than just pulling bare soil.
A few other things beginners run into.
- Cutting weeds off at the top instead of removing the root, especially with a hoe on established weeds
- Weeding when the soil is bone dry, which usually leaves roots behind
- Piling mulch directly against plant stems, which can trap moisture and invite rot
Thankfully, none of these are hard to fix once you know to watch for them. Most of it just comes down to slowing down slightly on the first pass.
Choosing the Right Mulch
Now that you’ve got a clean bed, you’ve got a choice to make, and it’s less complicated than the aisle at a garden center makes it look.
Organic Mulch
Organic mulch is anything that was once alive. Think wood chips, straw, pine needles, shredded leaves, and compost. As it breaks down, it feeds your soil, which is a real advantage over time. It also tends to keep soil cooler, a plus for crops like broccoli and peas that don’t love baking in summer heat.
That said, the tradeoff is that it breaks down, which means it needs topping off every year or so to keep doing its job.
Inorganic Mulch
On the other hand, inorganic mulch, like gravel, landscape fabric, and plastic sheeting, doesn’t feed the soil, but it also doesn’t disappear the way organic mulch does. It holds heat well, which is useful for heat-loving crops like tomatoes and peppers, and it lasts a long time without needing to be replaced.
The downside is drainage and airflow. Fabric and plastic can make it harder for water and nutrients to reach the soil naturally, and on top of that, gravel is a pain to remove if you ever change your mind about a bed’s layout.
Which Mulch Actually Suppresses Weeds Best?
If weed suppression is your main goal, finer, denser organic mulches tend to outperform chunkier ones. To illustrate, triple-shredded wood mulch packs together tightly and leaves fewer gaps for light to sneak through than a coarser single-shred product does.
| Mulch Type | Weed Suppression | Soil Benefit | Longevity |
| Triple-shredded wood/bark | Excellent | High (as it breaks down) | Needs yearly topping off |
| Straw | Good | Moderate | Breaks down fast |
| Pine straw/needles | Moderate to good | Moderate | Slow to break down |
| Compost (as mulch) | Mild | Very high | Breaks down quickly |
| Gravel/stone | Effective, best with fabric underneath | None | Long-lasting |
| Landscape fabric | Good short-term | None | Degrades, can shift over time |
For a vegetable bed specifically, I lean toward straw or shredded leaves. They’re cheap, they break down into the soil by next season, and they don’t hold enough heat to bake tender veggie roots the way dark plastic can.
How Much Mulch to Use (Depth Guide)
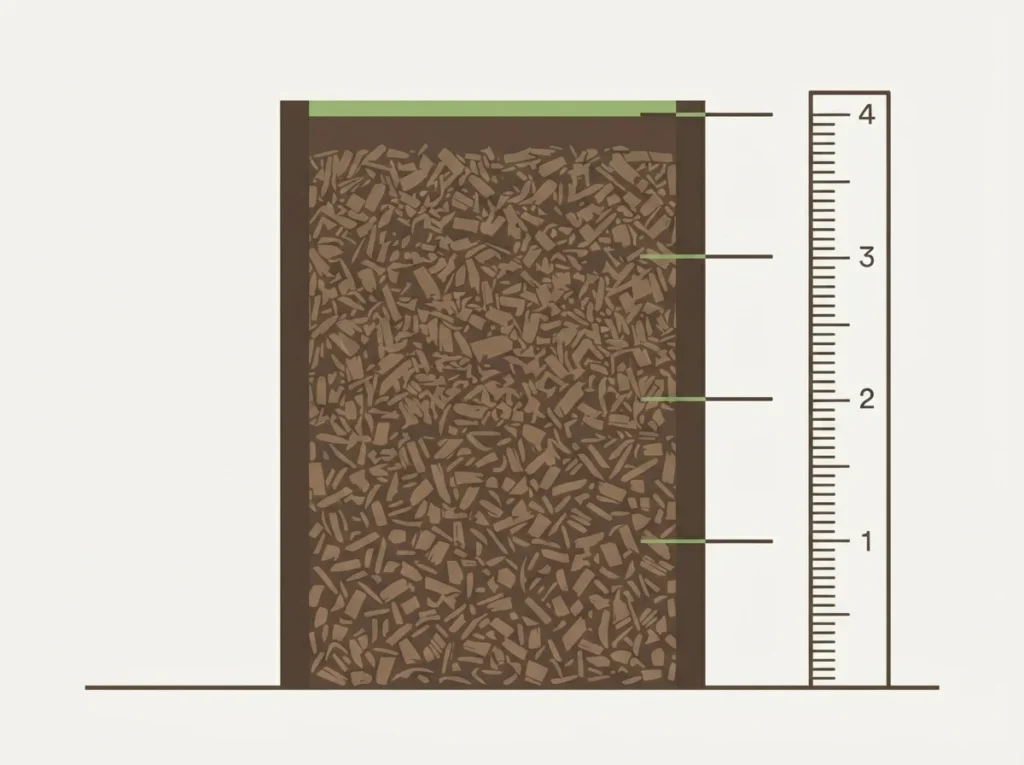
At this point, it’s worth slowing down on one detail most guides rush past. Depth actually depends on both what you’re using and what you’re mulching around, not just a single number you can apply everywhere.
Depth by Mulch Type
2 to 3 inches is a reasonable starting point for most organic mulches, with denser materials able to do their job at the lower end of that range and looser materials needing a bit more to fully block light.
Depth by Plant Type
| Area | Recommended Depth |
| Vegetables and annuals | 1–2 inches |
| Perennials | 2 inches |
| Trees and shrubs | 2–3 inches |
| Open beds needing heavy weed suppression | 3–4 inches |
Vegetable beds need a lighter touch than you’d think. Pile mulch too thick around young seedlings and you can actually slow them down, since the same light-blocking effect that stops weeds also works against tender new growth trying to reach the surface.
What Happens If You Use Too Much
Still, more isn’t better here. Go past about 4 inches and you risk suffocating roots and trapping too much moisture against the soil, which can lead to rot and poor drainage.
“Mulch piled directly against the crown of a plant is also a problem. It’s worth keeping a small gap of a few inches so air can move”
I learned this one the hard way with a tomato bed I got a little too enthusiastic about mulching. The plants sat sluggish for weeks, and pulling back some of the excess mulch made a noticeable difference within days.
How to Keep Mulch in Place
Mulch that ends up on your lawn or in the storm drain isn’t doing your garden bed any favors. A few simple habits keep it where you put it.
- Edge your beds before mulching. A clean, slightly recessed edge gives mulch somewhere to sit instead of spilling over onto grass or walkways.
- Water it in right after spreading. A light watering helps organic mulch settle and interlock instead of sitting loose on top, where wind can scatter it.
- Use heavier material on slopes. Straw and lightweight mulch tend to wash downhill in heavy rain. Chunkier wood chips or a jute netting layer hold up much better on an incline.
- Avoid mulching right before a big storm if you can help it, since freshly spread mulch hasn’t had time to settle yet.
None of this is complicated, but it’s the kind of thing nobody mentions until you’ve already lost half a bag of mulch to a windy afternoon.
Sheet Mulching: A Beginner-Friendly Option
A regular mulch layer works well on its own, but sheet mulching goes a step further, especially if you’re starting a brand-new bed over grass or a weedy patch you want gone for good.
What Is Sheet Mulching?
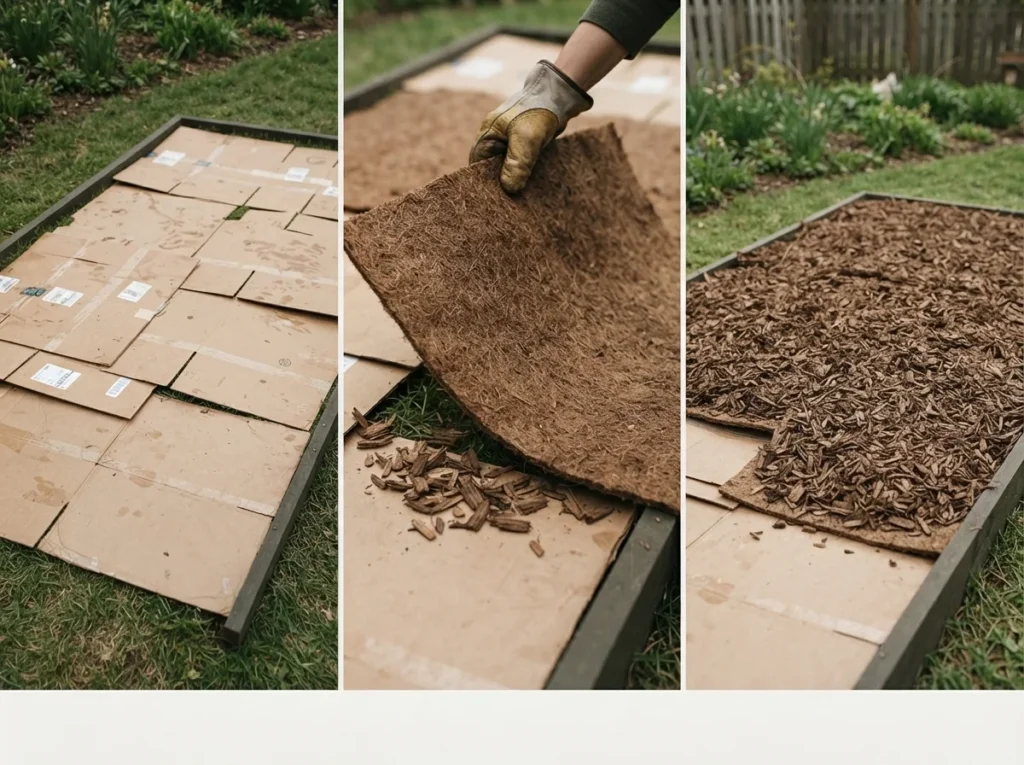
Sheet mulching means layering cardboard or newspaper directly on the ground, then covering it with organic mulch on top. The paper layer smothers whatever’s growing underneath, grass, weeds, all of it, while the mulch on top holds everything down and keeps things looking tidy while it works.
Some gardeners call it “lasagna gardening,” since you’re essentially stacking layers the same way you’d build a casserole.
Shallow vs. Deep Sheet Mulching
There are two ways to approach this, depending on your goal. Shallow sheet mulching uses just a layer of cardboard or newspaper topped with a few inches of mulch, and it’s a good fit around existing vegetables or landscape plants where you mainly want weed suppression. Deep sheet mulching stacks multiple layers of organic material, green and brown, like grass clippings and dried leaves, over months to build an entirely new bed from scratch, often over turf you want gone.
Step-by-Step: Layering Cardboard and Mulch
- Cut or mow existing vegetation down low, and leave the clippings in place. They’ll break down as part of the layering.
- Lay plain, untreated cardboard or several sheets of newspaper over the area, overlapping edges by a few inches so there are no gaps for light to sneak through.
- Wet the cardboard thoroughly. This speeds up decomposition and helps it lie flat.
- Top with 2 to 4 inches of organic mulch. Wood chips, straw, or shredded leaves all work.
- If you’re doing a deep sheet mulch for a new bed, keep alternating layers of “green” material (grass clippings, food scraps) and “brown” material (leaves, straw), wetting as you go, until you reach the depth you want.
- Let it sit. Shallow sheet mulching around existing plants can be walked on almost immediately. A deep sheet mulch for a new bed usually needs a few months to break down before it’s ready to plant into.
I’ve used the shallow version around vegetable beds and the deep version to reclaim a patch of lawn, and honestly, the lawn conversion is where sheet mulching earns its reputation. No digging, no renting a sod cutter. Just patience.
When to Put Mulch Down
Timing depends more on soil temperature than the calendar date on your wall. For vegetable gardens, the general rule is to wait until the soil has warmed up in spring before mulching. That’s because mulching too early can actually trap cold into the soil and slow your plants down, since mulch moderates temperature rather than adding heat.
For weed suppression specifically, earlier is better within that window. This is why getting mulch down before weed seeds have a chance to germinate works so much better than mulching after weeds are already up and growing.
If you’re in a colder climate, fall mulching around perennials and shrubs serves a different purpose. It’s more about insulating roots through winter than blocking weeds, so don’t feel like you need to rush that in spring.
Troubleshooting: Weeds Still Coming Back?
If you’re at the point where you’ve mulched properly and weeds are still showing up, keep in mind it’s usually one of a few specific things, not a sign that mulching “doesn’t work.”
Perennial Weeds vs. Annual Weeds
Annual weeds germinate from seed each year, and mulch is very effective against them since it’s blocking that germination step directly. Perennial weeds are a different story. Things like nutsedge or bindweed spread through underground roots or tubers, and a few inches of mulch on the surface doesn’t touch what’s happening below ground. Those need to be dug out or spot-treated directly. Mulch alone won’t get there.
When to Reapply Mulch
Organic mulch thins out as it breaks down, and once it’s thin, light starts reaching the soil again. Most gardens need a fresh top-up once a year, usually in spring. If you’re noticing more weeds than usual in late summer, check your mulch depth before assuming something else went wrong. There’s a decent chance it’s simply worn thin.
