
My first vegetable garden was a disaster before a single seed went in the ground. I tilled straight into heavy clay and added a bag of sand, because I’d read somewhere it would help drainage. What I ended up with was closer to dried cement than soil. It took me a full season of adding compost to undo that one bad decision.
This guide covers how to prepare soil for planting, whether you’re breaking ground on a brand new garden, refreshing an existing one, or filling a raised bed. Preparing soil for a vegetable garden follows the same eight steps in every case. Only the amount of work changes.
It focuses specifically on the soil itself, not on what happens once things are in the ground. We have separate guides on How to plant and how often to water a vegetable garden.
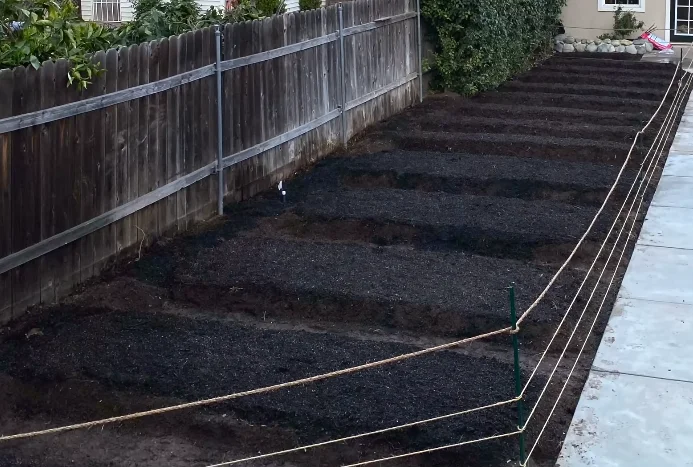
Quick Answer: Soil Preparation Steps
- Test your soil so you amend what it actually needs
- Choose a sunny location with at least 6 hours of direct sun
- Clear the ground of grass, weeds, and last season’s plants
- Understand your soil texture with a simple squeeze test
- Choose your preparation method, tilling or sheet mulching
- Add compost and organic matter in the right amount for your bed
- Check soil moisture before you dig or till
- Let it settle, then plant
That’s the whole process at a glance. Preparing the soil can take a weekend or a full season depending on the method you pick, but the order of these steps never changes.
Let’s go through each one properly.
Step 1: Test Your Soil
I skipped this step on my first garden and paid for it. A soil test takes the guesswork out of everything that follows. It tells you what you’re actually working with instead of leaving you to guess.
What a Soil Test Tells You
A basic test shows your soil’s pH, its major nutrient levels, and sometimes its texture breakdown. Most tests come back with clear recommendations. Add lime if it’s too acidic, add compost if organic matter is low, that kind of thing.
You can get a soil test kit at most garden centers for a quick DIY read. For a more accurate result, your local cooperative extension office usually offers lab testing for a small fee. They’ll mail you back an actual report with real numbers, not just a color chart.
Understanding Soil pH
Most vegetables grow best in slightly acidic to neutral soil, somewhere around 6.0 to 7.0 on the pH scale. Test before you add any lime, because applying it blind can push pH too high and cause a different problem than the one you started with.
If your test comes back well outside that range, you can raise pH with garden lime or lower it with elemental sulfur, both available at any garden center. It’s not an overnight fix though. Expect a few weeks to a season for the adjustment to actually take effect.
Step 2: Choose a Sunny Location
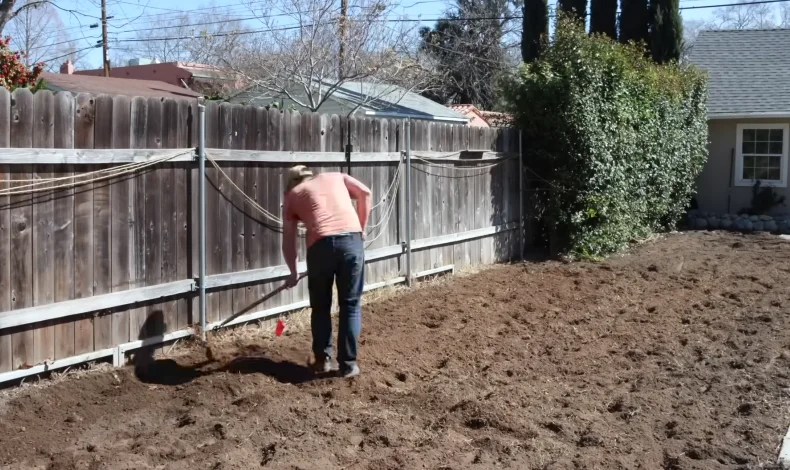
Before you touch a single shovel of dirt, make sure you’re prepping the right spot. Vegetables need three things above all else: sun, soil, and water.
You can fix soil and deliver water almost anywhere, but a shady corner of your yard will stay shady no matter how good your compost is.
Look for a spot that gets at least 6 hours of direct sun a day. Walk your yard at a few different times if you’re not sure. Morning shade and afternoon shade come from different directions, and it’s easy to misjudge.
Once you’ve picked the spot, our vegetable garden layout guide covers how to lay out beds and paths within it.
Step 3: Clear the Ground
What this step involves depends on where you’re starting. Breaking ground on a brand new garden is the harder path, and the first year genuinely is the toughest. If you’re working a bed you planted last season, this part is quick.
If You’re Starting From Scratch
Your vegetables will struggle if they’re competing with grass and weeds for water and nutrients, so clearing the area completely matters more than people expect.
You’ve really got three options here:
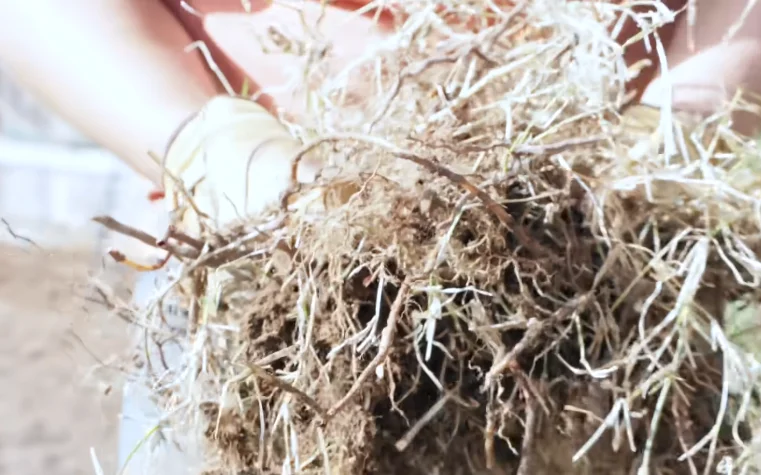
- Remove sod by hand with a sharp spade. Works fine for small areas, but it’s genuinely hard, sweaty work.
- Rent a sod cutter. Speeds things up a lot on a bigger area if you don’t mind the rental fee.
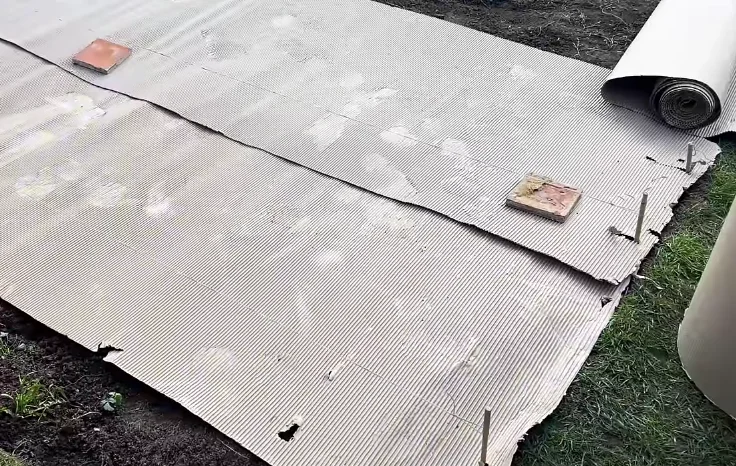
- Smother the grass with cardboard or thick layers of newspaper. Zero digging, but you’ll wait weeks or months before the area is ready.
Whichever method you pick, try to get the roots out or fully smothered, not just the visible grass on top. Grass that grows back from leftover roots is a headache you don’t want halfway through summer.
One thing worth knowing: weed seeds can sit dormant in soil for years and still sprout once conditions are right. Clearing the visible plants doesn’t always clear the problem. If you’re working an area with a known weed history, keep an eye out that first season even after a thorough cleanup.
If You Have an Existing Bed
Pull out anything left over from last season. If you covered your bed with a winter mulch like straw, rake it off before you start amending the soil again. That old mulch is good material for the compost pile.
Step 4: Understand Your Soil Texture
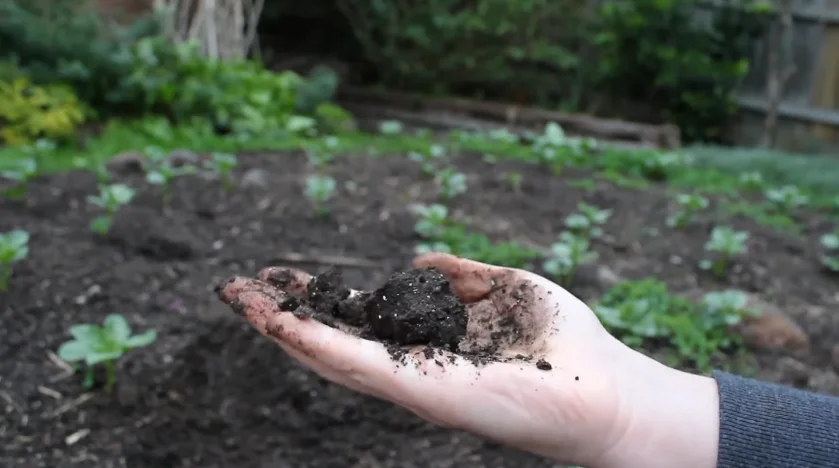
Grab a handful of moist soil and squeeze it.
If it falls apart immediately, you’ve likely got sandy soil. It drains fast but doesn’t hold onto water or nutrients well. If it squishes into a dense, sticky ball that holds its shape, you’re dealing with clay, which holds nutrients well but drains poorly and compacts easily.
Neither one is a problem you can’t work with. Both are fixed the same way, with organic matter added over time.
Common Mistake Adding sand to clay soil, or clay to sandy soil. Here’s a mistake I made myself, and I still cringe thinking about it. It seems like it should balance things out. It doesn’t. Mix sand and clay together and you can end up with something closer to concrete than garden soil. If your soil leans heavily toward one extreme, fix it with compost and organic matter instead, never with the opposite mineral type.
Step 5: Choose Your Preparation Method
This step is for new gardens. If you’re working an established bed, skip ahead to step 6, since an existing garden rarely needs more than a fork and a rake.
There are really two main paths, and honestly, both work. Which one you pick depends on how much time you have and how much physical labor you’re up for.
Tilling vs. Sheet Mulching
| Steps | Tilling / Double Digging | Sheet Mulching |
|---|---|---|
| Physical effort | High | Low to moderate |
| Time to plant | Ready right away | A few months to a year |
| Best for | Fast results, compacted soil | Patience, less soil disturbance |
| Soil health impact | Can disturb soil life if overdone | Builds soil gently over time |
| Cost | Compost and fertilizer only | Cardboard, compost, mulch materials |
Method 1: Tilling or Double Digging
Double digging means loosening soil in two layers using a garden fork or spade rather than a machine. You go down about a foot in the first pass and another foot in the second, working compost in as you go.
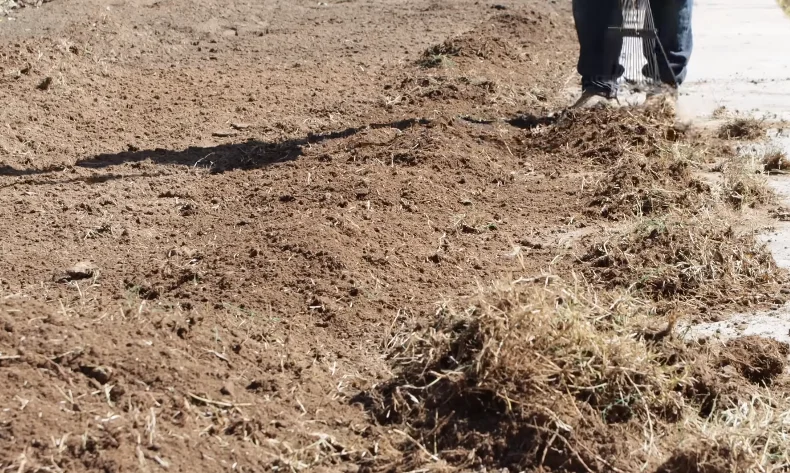
Tilling with a machine does the same basic job faster, but it’s harder on soil structure and the organisms living in it. Earthworms, fungi, and beneficial bacteria all take a hit from heavy machine tilling. I lean toward a garden fork for smaller garden beds these days. It’s slower but gentler.
Whichever tool you use, this is the moment to work your compost and any amendments into the top 12 to 15 inches of soil. Take your time breaking up clumps as you go.
Method 2: Sheet Mulching (Lasagna Gardening)
Sheet mulching, sometimes called lasagna gardening, means smothering grass and weeds under layers of cardboard or newspaper, then building organic material on top. You’re essentially composting right on the spot where your garden will eventually be.
A simple version looks like this. Lay wet cardboard or newspaper on the bottom, add a few inches of manure or grass clippings, then a thicker layer of straw or leaves on top. Keep layering, moisten it as you go, and let it sit.
The tradeoff is time. You genuinely can’t plant into fresh sheet mulch and expect much success. Most gardeners wait somewhere between one season and a full year before it’s ready. If you’re patient, though, it builds excellent soil without much digging at all.
Step 6: Add Compost and Organic Matter
Compost is the one amendment nearly every garden benefits from. Treat it as a yearly habit rather than a one-time job, since soil uses up organic matter every season you grow in it.
How much you need depends entirely on what kind of bed you’re working with.
How Much for a New Bed
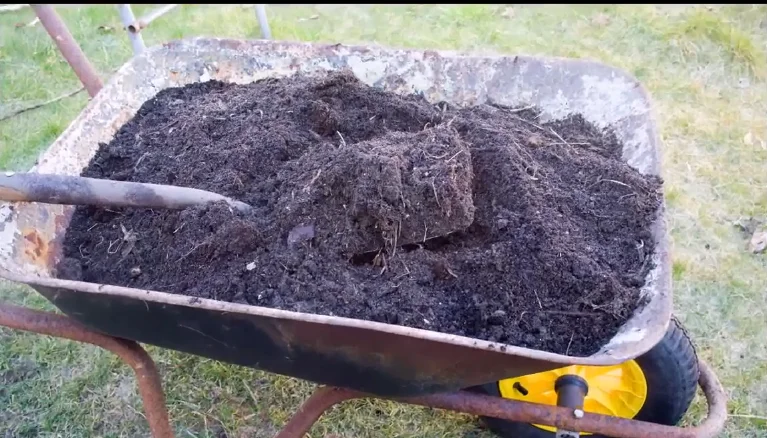
Aim for about 4 to 6 inches of good quality compost spread across the surface before working it in. That sounds like a lot until you actually see it spread out. It settles down considerably once it’s worked into the soil.
Quality matters as much as quantity here. Good, fully finished compost should smell earthy, almost sweet, not sour or rotten. If what you’re buying or making smells off, it likely hasn’t finished breaking down yet, and working it into your soil too early can actually rob nitrogen from your plants rather than feeding them.
How Much for an Established Bed
You don’t need nearly as much as a new garden. Usually 1 to 3 inches of compost spread over the surface is plenty, plus a dusting of organic fertilizer suited for vegetables. Heavier, poorer soil needs more. A well maintained bed needs less.
You also don’t need to go nearly as deep. Working amendments into the top 6 to 8 inches is enough for an established garden. A garden fork does this job well. Finish with a rake to break up any surface clumps and leave a fine texture for seeds.
Filling a Raised Bed
Raised beds work a little differently, since you’re not amending existing ground. You’re building the soil from scratch inside a frame, which means buying most of it.
A reliable starting point is roughly half quality topsoil, a third compost, and the rest a coarse material like sand or bark fines. That blend drains well, holds water, and still gives roots something solid to grip.
Measure before you buy. Multiply width by length by depth in feet to get cubic feet, then divide by 27 for cubic yards. A 4 by 8 foot bed at 12 inches deep needs about 32 cubic feet, which is roughly 16 of the two cubic foot bags. Once you pass a cubic yard, bulk delivery almost always beats bags on price.
If you haven’t built the frame yet, start with our guide on how to build raised garden beds.
Compost vs. Organic Fertilizer
People use these terms almost interchangeably, and they’re really not the same thing.
Compost’s main job is adding organic matter. It improves soil structure, helps with drainage and moisture retention, and feeds the biological life in your soil.
Organic fertilizer’s job is delivering specific nutrients. Nitrogen, phosphorus, and potassium, often labeled as NPK on the package, are the things plants actually pull out of the soil to grow.
You genuinely want both. Compost builds the soil itself over the long run. Fertilizer feeds what you’re growing right now. Together, these are what people mean by soil amendments, meaning anything you add to improve what’s already there.
Skipping fertilizer and relying on compost alone often works fine for a season or two, but eventually your soil will need that nutrient top-up too.
Step 7: Check Soil Moisture
Don’t dig or till soil that’s too wet. It damages the structure and can leave you with hard clumps for months.
Quick Tip Squeeze a handful of soil into a ball and drop it from about waist height. If it breaks apart cleanly when it lands, you’re good to work it. If it holds together in a solid, muddy clump, give it a few more dry days.
This one test saves more gardens than any amendment you can buy. Working wet soil packs it into hard clods, and those clods can take a full season to break back down.
Step 8: Let It Settle, Then Plant
Preparing soil for planting isn’t finished the moment you stop digging. Freshly worked soil is full of air. Digging, tilling, and raking all trap pockets that weren’t there before, which is why a bed looks higher right after you finish than it did when you started.
Those pockets collapse the first time the bed gets a real soaking. If your seeds are already in the ground when that happens, they settle deeper than you planted them, and small seeds especially may never make it to the surface. Transplants sink and end up sitting lower than you meant.
You can plant right away if you’re short on time. Most gardeners do. But giving the bed a week or two first gives you a more even surface and better seed-to-soil contact, and it costs you nothing but patience.
Here’s the routine that works:
- Rake the surface level. Break up clumps and pull out any rocks you turned up.
- Water it thoroughly, or wait for a good rain. This is what actually triggers the settling. A bed left dry won’t settle much at all.
- Wait about a week. Two is better if your planting window allows it.
- Check the level again. Top up any low spots with a little more compost or soil and rake it smooth.
- Plant.
Remember Raised beds settle the most, since everything in them is loose material with nothing underneath holding it down. Expect to lose an inch or two of depth in a new bed and plan to top it back up before planting.
Sheet mulching is the exception to all of this. That method isn’t about settling at all, and it needs months rather than weeks before the bed is plantable.
Cover Crops as a Soil-Building Option
If you’ve got a bed sitting empty for a season, whether that’s over winter or between plantings, a cover crop is worth considering.
Crops like clover or winter rye get planted specifically to feed the soil later, adding organic matter and, in the case of clover, actual nitrogen back into the ground. It’s essentially free soil improvement if you’ve got the time to let a bed rest.
A simple example: sow winter rye in early fall after your last harvest and let it grow through the cooler months. In spring, cut it down at the base about two to four weeks before you plan to plant and leave the tops lying on the surface. That gives the residue time to start breaking down and keeps the soil covered the whole time. You can till it in instead, though that costs you the erosion protection you spent the winter building.
I didn’t bother with cover crops for years, honestly, and looking back I wish I’d started sooner. It made a noticeable difference the first time I actually tried it.
When to Prepare Your Soil
Spring is the most common time for preparing vegetable garden soil, timed so the bed is ready right around your planting window.
If you’re sheet mulching, the timing shifts. Late summer or fall works well for that method, since it gives the material months to break down over winter and leaves you with a ready bed by spring.
Tilling or double digging can technically be done anytime the soil isn’t frozen or waterlogged. Just avoid doing it too close to your frost date without letting things settle first, or you’ll leave your soil a little rough for delicate seedlings.
Common Soil Preparation Mistakes
Most of the trouble people run into when preparing soil for vegetable garden beds comes down to the same handful of errors.
- Working soil while it’s too wet. The most common mistake by far, especially when you’re eager to start planting. Wet soil compacts easily, destroying its structure and making it harder for roots to grow.
- Mixing sand into clay soil, or clay into sandy soil. It sounds logical, but it rarely creates balanced soil. In heavy clay, adding sand can even create a concrete-like texture.
- Over-tilling every year. This gradually damages soil structure and reduces beneficial organisms. Once a garden bed is established, gentle cultivation is usually all that’s needed.
- Not removing grass and weed roots completely. Leftover roots lead to weeds growing back and competing with your vegetables all season.
- Skipping a soil test and guessing. This wastes both time and money. A simple test tells you the pH and nutrient levels, so you only add the amendments your garden actually needs.
- Planting immediately into freshly worked soil. Seeds sink as the bed settles. A week of watering and waiting fixes it.
Frequently Asked Questions
How Long Garden Soil Preparation Takes and What It Costs
People always ask me this, and the honest answer is that it depends heavily on your method and your starting soil.
Tilling or double digging a new garden bed can usually be done in a single weekend, maybe two if you’re working a larger area entirely by hand. Sheet mulching takes far less physical effort but a lot more patience. Plan on it not being plantable for anywhere from a few months to a full year.
The cost of preparing garden soil depends on the size of your garden, the type of soil you already have, and whether you buy amendments in bags or in bulk.
A basic soil test may be inexpensive or even free through some local programs, while professional laboratory testing generally costs more. Compost and other amendments can become the larger expense, especially when preparing a large garden.
If you make your own compost or already have suitable organic matter available, you may be able to reduce the overall cost considerably.
How do gardeners prepare their soil before they plant a vegetable garden?
Most follow the same basic sequence. They test the soil to find out what it needs, clear out grass and weeds, loosen the top 12 to 15 inches, work in several inches of compost, and then let the bed settle for a week or two before planting. Experienced gardeners tend to test first and amend second, rather than adding whatever they have on hand and hoping it helps.
Do I need to till my soil before planting?
Not always. Tilling gets a new garden ready faster, but sheet mulching or simply topdressing an existing bed with compost works well too, especially if you want to avoid disturbing soil structure.
How much compost do I need for a new garden?
Plan on about 4 to 6 inches spread across the surface for a brand new bed, worked into the top 12 to 15 inches of soil. An established bed needs far less, usually 1 to 3 inches.
Can I build a garden on top of grass?
Yes, sheet mulching is designed for exactly this. Layer cardboard or newspaper over the grass, then build up compost, manure, and mulch on top, and let it break down over a season.
How long should I wait before planting after preparing soil?
You can plant right away if you need to, but watering the bed and waiting a week or two gives you a more even surface and better results with small seeds. Sheet mulched beds are different and need a few months to a full year.
Is newspaper or cardboard safe to use when preparing soil?
Yes, most modern newspaper ink is soy based and considered safe for this use. Avoid glossy pages or colored inserts, since those contain different and less desirable chemicals.
What’s the best soil mix for raised garden beds?
Roughly half quality topsoil, a third compost, and the rest a coarse material like sand or bark fines. Topsoil gives the mix structure, compost brings nutrients and soil life, and the coarse material keeps it draining. Avoid filling a bed with compost alone, since it collapses within weeks and holds water unevenly.
Can I just use bagged garden soil instead of amending my own?
For a small container or a single raised bed, bagged soil is a fine shortcut. For a full in-ground garden it gets expensive fast, and amending what you already have is almost always more practical at that scale.
What if my soil has a lot of rocks?
Rake out the larger ones as you work the soil, especially in the top foot where roots will be growing. A few small stones scattered through clay or loam generally isn’t a problem. It’s the bigger ones that cause trouble, and mostly for root vegetables specifically.
What to Do Next
Once your soil is ready, the next steps are choosing what to grow and getting it into the ground at the right time. Our guides on easy vegetables to grow and when to plant a garden pick up right where this one leaves off.
REFERENCES
UC Master Gardener Program – Soil Improvements and Preparation
https://ucanr.edu/program/uc-master-gardener-program/soil-improvements-and-preparatio
University of Florida IFAS Extension – Soil Preparation and Liming for Vegetable Gardens
https://ask.ifas.ufl.edu/publication/vh024
University of Illinois Extension – Prepare the Soil
https://extension.illinois.edu/gardening/prepare-soil